How to Install LED Strip Lights – The Ultimate Guide
It may sound like a simple question whose answer is known to almost everyone, the answer to How to install LED strip lights is not straightforward as it sounds.
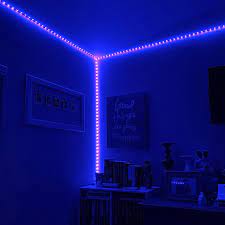
People install LED strip lights on multiple occasions, and this trend is here to stay! After all, they are a lightweight and inexpensive solution for illuminating your spaces.
By the way, check out our picks of best LED Strip lights for TikTok videos, bedroom, indoor use, mood lightning or we even have a collection of Best LED Strip lights for Christmas!
Though it is a simple process and you can learn it after watching a 10-minute video, but that’s not enough.
If you are one of those who wish to illuminate your space according to your own wish and complete your dream DIY project, this guide will help you do that.
In this guide, we will educate you on how to install LED strip lights, what is the required equipment and what are things you must consider before installing or even making a purchase.
This guide contains all the information regarding purchasing the right equipment, installing, powering, and connecting led strips together.
Required Equipment
Let’s talk about the equipment you need to install these LED strip lights. Whenever you decide to start a DIY project, the first thing you should do is to list down all the stuff you’re going to need for it.
After all, you do not want to get stuck at some point during the installation of the strips. Here’s the list of things you need to install LED strip lights from start to finish.
1. Accessories for mounting and connecting
This depends upon where and how you want to install your strip lights. If you want to install the lights in a setting where you’ll connect multiple strips together, you’ll need different types of connectors.
Here’s a list of items you’ll need for mounting and connecting the LED Strip Lights:
1. Pigtail connectors/interconnecting jumpers for connecting the strips
2. Clips for mounting, Heat Shrink Tubes for mounting outdoors/waterproofing
3. Nuts for wires and CPS Adapters for connecting to the power supply
4. Adhesion Promoter for mounting on areas that are not smooth
5. Aluminium Channels(kits) for custom fixtures
6. Soldering tools for connecting two LED Strip Lights
2. Power Supply and Amplifier
Most LED strip lights come in a kit, and that kit includes all of the accessories. But, if you are a DIY enthusiast and want custom fixtures, you’ll have to purchase all of the stuff on your own. Deciding which power supply to purchase depends upon the type of strips you wish to use.
If you want to go with 12V LED strip lights, you should choose a 12V Power Supply. If you want to go with 24V LED strip lights, you should purchase a 24V Power Supply.
When it comes to installing the LED strip lights, the most important factor is the powering of lights with the proper power supply. Depending on which type of LED strip lights you use, you’ll need different types of power supplies.
Overpowering the LEDs (using a high-voltage power supply with low-voltage LEDs) will result in LEDs getting heated and burnt. Overpowering significantly decreases the lifespan of LED strip lights. Underpowering the LEDs(using a low-voltage power supply with high-voltage LEDs) will result in LEDs not even turning on.
The biggest concern while powering the LEDs is their lifespan. And, there’s a way to maximize it. It is recommended that you should purchase a power supply with 20% more power than you need.
Simply, calculate the required power of your LEDs and multiply it by 1.2. That’s your answer. It is recommended to use a power supply that has 20% more power capacity than your requirement. The Power Supply also loses out on their power after some time, so doing this will cover for that.
If you plan to install multiple LED strip lights, out of which one or a few can reach their max runs, you must install an amplifier. Otherwise, if you connect the next strip to the end of the previous one, you’ll face a voltage drop, resulting in low brightness in both strips.
Even though you can place the power supply in the middle and connect both the strips directly to the power supply instead of connecting them to each other, using an amplifier will give you better results. A few extra bucks for better lighting should not be considered a problem, because it will only benefit you in the long run.
There are different types of amplifiers in the market, and you have to choose what’s suitable for your setup. To be able to make informed decisions about buying the correct powering devices, check out our comprehensive guide on Powering the LED strip lights.
3. Lighting Controller
The controller is used mainly to dim the lights or control the colors. If you want to use simple white LED strips, a controller won’t be necessary.
There are multiple options available in the market for controllers. There are simple dimmers that are used only to control the temperature and brightness of the lights, and there are smart controllers that are used to modify the colors, make the lights adapt to music, different modes and speed, and much more.
To learn more about controllers and dimmers, you can see our guide on the best LED controllers.
How to Install LED Strip Lights – the step by step process
The process of installing the LED Strip lights may differ according to your needs. The process we show here is for the DIY enthusiasts who want to illuminate their homes or furniture/places inside their homes.
For outdoors, vehicles, and other locations where there will be dust, water, or pressure on the LEDs the equipment/process will be a bit different.
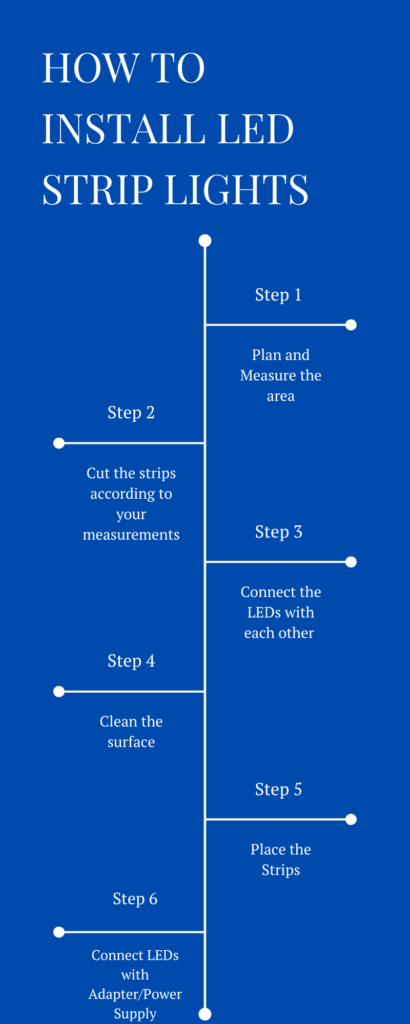
Here’s the step-by-step process of installing LED strip lights at your home:
1. Plan and measure the area where you want to install LEDs
First things first, measure the whole area of the project. You must know how many feet are there, and which LEDs to purchase. LED strip lights come in different variants based on their size, i.e. 16ft and 32ft, etc.
Once you have a clear vision of how many strips you need to illuminate your space, it will be easier for you to make a decision. In fact, this should be considered as more of a pre-purchase decision as compared to being an installation decision.
2. Cut the strips according to your measurements
After you’ve decided the number of strips you need, you need to modify it according to your space. For instance, if you want to install the LEDs on a ceiling that is 14ft in length, and 13ft in width; even though you will need 54ft of LEDs but you will have to cut it on the corners.
You can be good with bending the LEDs, but that may have other issues. So, after measuring the area, you need to cut the LEDs according to your requirements.
3. Connect the LEDs with each other
Once cut and modified according to your requirements, it’s time to connect these LED strip lights with each other. This part can be highly technical as well as highly simple.
The simpler way to connect two different LED strips with each other is to use what’s called “connectors”. These connectors are mostly part of the kits and come along with the LEDs but in some cases, you have to buy them as well.
Using these connectors is simple, but is a temporary solution as compared to soldering the two LEDs. Soldering, on the other hand, can become a difficult task for people with no experience of that. For this type of person, we have a dedicated guide. Look up the guide and learn how to solder LED strip lights with each other.
Simple clips are used while connecting one strip to the other if it’s a straight surface, but if the strips are supposed to cross a corner, then connectors/soldering become better alternatives.
As discussed earlier, you will also have to take care of the power source when connecting multiple LED strips with one another. If one strip is maxed out, and you connect it with another strip – there will be problems in their brightness/lighting because of max runs.
Therefore, it is recommended to connect the strips directly to the power supply, or for better performance, use an amplifier.
4. Clean the surface
After you’ve finished all the preliminary preparations for your dream DIY setup of LED strip lights, it’s time to actually place them on the objects/space. But wait, if you want to keep these LED strip lights there for a longer period, you must clean the surface to enhance the durability of the adhesive on the back of the strips.
The adhesive will not stick for long in places where there is dust, sand, or any other liquid or solid object. Therefore, it is recommended to clean the surface before installing/placing the LED strips.
For better cleaning, pick up a cloth, dampen that in warm water and then clean the surface with that. Also, make sure that there are no grain/small objects left behind on the surface. If there are any, the adhesive won’t stick even for a day.
If you face difficulty in removing stains from the surface, consider using isopropyl alcohol instead of water. You can also use vinegar combined with water as well. Both will have the same impact.
It will remove the stubborn stains/objects that couldn’t be removed with water. You can also use special cleaners for the type of surface you’re installing the LEDs, for instance, wood cleaner for wooden surfaces, if the vinegar/alcohol solution didn’t work.
After the surface has been cleaned, leave it to dry for 30 minutes, or remove any moisture with a dry and clean cloth.
5. Place the strips
It’s the time! It’s finally time to place the strips on the surface. Remove the adhesive backing from the strip and place your strips on the surface. These LED strips are like stickers. Remove the adhesive from the initial part, and then gradually remove the other part as you place the strips on the wall and press it with your hand.
Make sure to place them at the right place and then proceed to remove the adhesive. Because, if you decide to change its position, you’ll have to remove it and that will negatively affect the adhesive.
If the LEDs don’t stick to the surface, it means that the surface is not clean. But, remember that depending on the adhesive is not the only solution. You can go with clips, tape, or any other mounting tool out there.
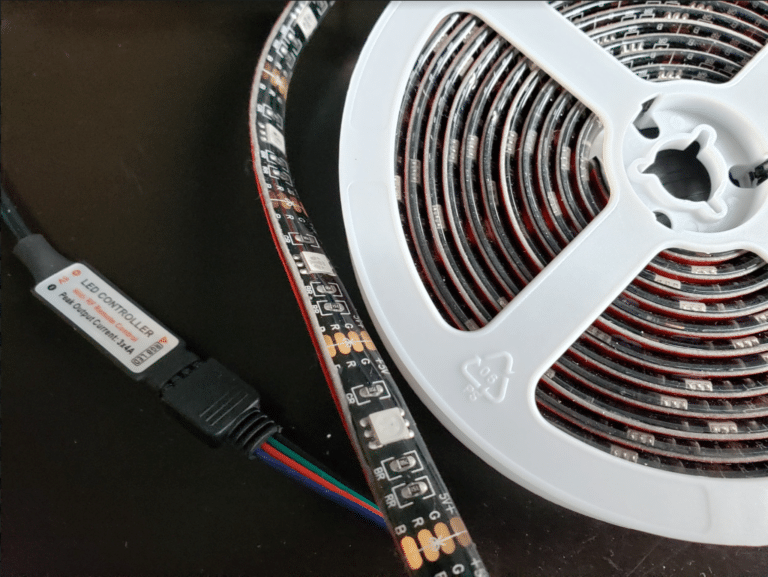
6. Connect LEDs with the Adapter/Power Supply
After the strips have successfully been placed, it’s time to connect them with an adapter/power supply. The power supplies come in different variants, and you need to select the right one for you.
They have quick connectors which connect directly with the LEDs. To ensure the wires are not loose, you can opt for connectors that have the option to screw the wires in.
After connecting the LEDs with the power supply, plug the power supply into the main switch. The DC adapter will run on your normal power outlet, and it will serve as the power source for 5V, 12V, or 24V LEDs.
You can also use a battery pack as a power source. This is best if you want to install LED strips outdoors or someplace where you can’t find any power outlet. But not all battery packs will work. Here’s our article on battery-powered LED strip lights to learn more about this.
Another way to install
The process defined above is for those DIY enthusiasts who want their custom lighting fixtures. Following that will give you complete control over the lights even after they’ve been installed. But, if your priority is not customization of the fixture, but the durability; then, installing the LED strip lights with an aluminum channel.
The aluminum channels are there in many variants such as angled or flat. There are different widths and lengths, so you must choose what best suits your requirements.
The channel is mounted with screws and is way more firm. It is recommended for outdoor locations because it provides the durability required. The channels also have a plastic cover that will make the light more uniform.
Before you buy any LED strip light
Let’s talk about the stuff that you should keep in mind before buying the LED strip lights. There are different approaches that you might take when installing the LED strip lights. And, they all vary based on your preferences and requirements.
The process that we’ve outlined in this article is for those DIYers who want to have a custom fixture and most probably indoors. Before installing LEDs, there are certain things you must keep in mind. Here’s a list of those:
1. Choose the right type of LEDs
The type of LED strip lights you choose to install is the most important factor in your project. The budget, the end results, the process of installation, and the equipment required, all of these are directly or indirectly dependent upon this decision.
If you want to install the strips indoor, then paying a ton of extra money on waterproof LEDs with smart app controls will not be a sensible decision. Also, choosing normal cool white LED strips to install outdoors for a party will end up spoiling your mood instead of saving you money.
Apart from this, you must also know what type of Waterproofing you want. There are certain types of ratings given to waterproof LED strip lights, and this rating is called the IP rating system.
Just like LED strips, the equipment that comes along with them also will be different for different projects. Therefore, before purchasing anything, carefully analyze your needs and then purchase the LED strip lights that you need.
2. Connecting and Soldering LED Strip lights
We have talked about connecting LED strip lights together, but this is about making a decision of either going with simple connectors or soldering the LEDs.
If you want to install LED strip lights in an outdoor setting, or a place where will be water or pressure, you should always prefer soldering over connectors. But, if you want to install LED strip lights on the ceiling or at a location where they won’t get any water or pressure, using connectors would do the work.
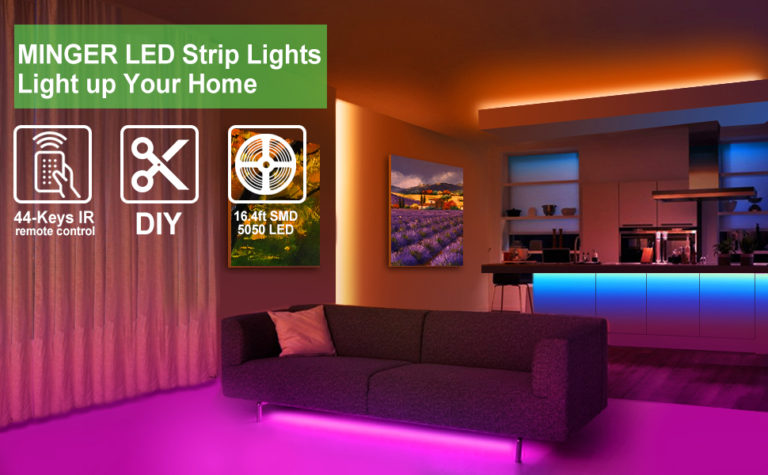
3. Controllers, features, and prices
There are many LEDs that offer smart controllers that can help you monitor the strips through an app. There are also some products that offer music synchronization of the lights. And, these controls and features come at a price. RGB LED Strip lights are expensive than the normal ones. By the way, check out our list of best RGB LED Strip lights to learn more about them.
All of these features are good, but you should only purchase these lights if you really need those features. The products that have those features charge a ton of money for LEDs and are not a good choice if you will barely use those features.
Check out our article for installing under cabinets or counters.